Banner 9 Support

🧭 Overview
- Below you'll find some training resources to help you get started and find your way around the Banner 9 interface.
- Best for: Faculty | Staff
- Time: ~15 minutes
Prerequisites
- Active Stockton account and SSO access
- Access to Banner Entitlements. Banner Access Request Form
Where do I go to access Banner 9 (Fomerly known as INB)?
In the Portal Login Page, click on Banner 9 Pages
How do I search for Forms?
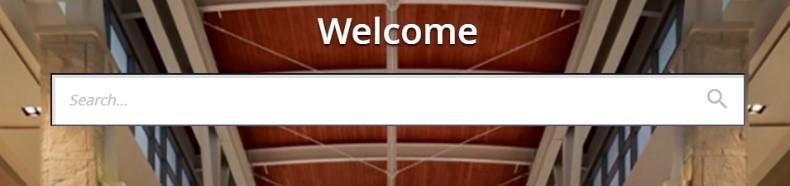
1.) The search tool is available as soon as you log in to Banner 9. Just enter the form name and hit the Enter key
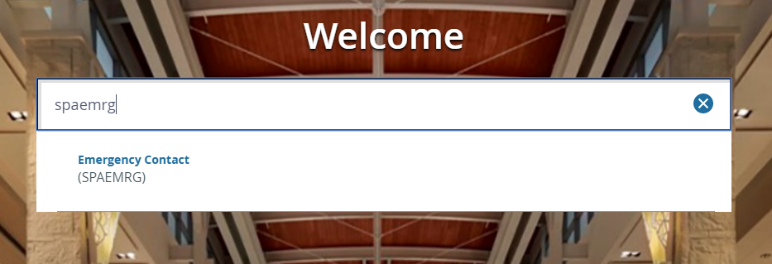
2.) As you type the form name, the search tool will automatically list forms that match the first few letters
Will the keyboard shortcuts change?
There are some differences between Banner 8 and 9. Click here for a complete list of shortcut keys
How do I add Banner pages to the "My Banner" section?
1.) Go to the form GUAPMNU, from there you have to hit the drop down to select the type of object you want

2.) Find the object you want using the navigation buttons at the bottom

3.) Double Click on the object, and click "insert" on the right. Finally, click "save."

4.) You need to logout and back in for the changes to take effect, but afterwards when you go through the menu tree you will have a “My Banner” with your saved selections!

How to Access Xtender via the Web
Step 1
Navigate to the new Xtender access link so you can authenticate using your goPortal credentials. Access Link
Step 2
Log in to CAS using your goPortal credentials in the following fields:

Step 3
You are now logged into the new AppXtender Web Interface.
Please continue to the General: New Xtender Web Interface Explained which is located below
How to Access Xtender via Banner 9
Step 1
Navigate to the Banner 9 Application Navigator
Step 2
Open the form that the document is referenced by

Step 3
The document should now appear or you will be able to scan - Please continue to the General: New Xtender Web Interface Explained which is located below
How to Reset an Expired Banner 8 Password
To reset your expired Banner 8 password, enter Banner 9 with your GoStockton Portal credentials and navigate to the form GUAPSWD. Enter your previous Banner 8 password and new password into the respective fields and click save to set your new Banner 8 password.

If you’re not sure what your old banner 8 password was, the Information Security team can provide you with a new temporary password that you can use to reset it with. They can be reached at x4779.
How to Login to Argos
To access Argos, you will first need to have the necessary privileges. Please fill out the following form and be sure to follow all instructions, including checking off "Argos Access."
Once your account has all of the necessary permissions, follow the instructions below
to log in.
Step 1.) In your web browser, navigate to https://maps-prod.stockton.edu/
You will be prompted for a username and password. This will be the same username and
password as your goPortal login.

Step 2.) To open Argos, click on the Argos Web Viewer

Step 3.) If it is your first time using Argos, follow the provided on-screen tutorial in the
Web Viewer.
Step 4.) After finishing the tutorial, you will be able to view all folders and DataBlocks
that your account has access to.
To find out how to use the "Person Identification Report (GUASYST)", please see our Argos Support page.
Argos
How to Login to Argos
To access Argos, you will first need to have the necessary privileges. Please fill out the following form and be sure to follow all instructions, including checking off "Argos Access."
Once your account has all of the necessary permissions, follow the instructions below
to log in.
Step 1.) In your web browser, navigate to https://argos.stockton.edu/
You will be prompted for a username and password. This will be the same username and
password as your goPortal login.
Step 2.) To open Argos, click on the Argos Web Viewer
Step 3.) If it is your first time using Argos, follow the provided on-screen tutorial in the
Web Viewer.
Step 4.) After finishing the tutorial, you will be able to view all folders and DataBlocks
that your account has access to.
How to use the Person Identification Report (GUASYST)
Step 1.) Log into Argos by navigating to https://argos.stockton.edu/
Step 2.) Under "Explorer", navigate to "General"

Step 3.) Click on "Person Identification Report (GUASYST)."

Step 4.) Type in a Z number on the top left-hand of the page next to "ID.," and click "update."

You will now be able to all of the different institutional roles of the specified person.
Banner Student: Submitting Final Grades
Faculty submit final semester grades for students through the Faculty tab in the GoPortal.
Submit final grades
This video guide will walk you, step by step, through the process of submitting final semester grades for students. For written directions, see the steps below.
-
Open Final Grades
Open your web browser (Firefox or Chrome) and log in to the GoPortal. Navigate to the Faculty tab and then, under the Faculty Advising Tools channel on the right-hand side of the page, select the Final Grades link.


-
Select the term
Select the term you will be submitting grades for. Select Submit to proceed.

-
Select a course
A drop-down menu will list the course or courses you teach. Select a course from the menu and select Submit to proceed.

-
Enter and submit grades
On the grade entry page, select a letter grade from the drop-down menu for each student. When you have finished entering grades, select Submit to finalize your changes.

-
Continue to the next page if needed
If your course has over 25 enrolled students, after selecting Submit you will need to continue to the next page to submit grades for the remaining students.

Related Banner Support Links
Get help
- Phone: 609‑652‑4309
- ️ Email: helpdesk@stockton.edu
- 🧾 Submit a ticket