Mail Merge in Word 2016
Mail Merge allows you to create multiple documents based on information contain in two different files. You’ll need the main document (e.g. a letter), and a data source (e.g. list of addresses) from Excel or Outlook Contacts. Then follow the instructions below to produce a merged document with these files using Mail Merge.
- In Word, open your main document such as a letter or the content of an e-mail. If creating labels, start with a blank new document.
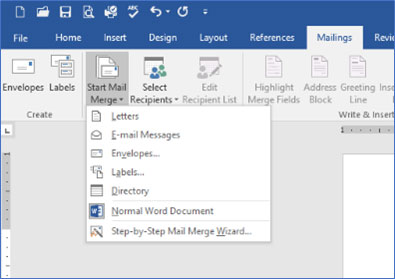
- Click on Mailings > Start Mail Merge >Step-by-Step Mail Merge Wizard…
- The Mail Merge Wizard will open as a Task Bar to the right of the document. Select
the document (Letters, E-mail messages, Envelopes, Labels or Directory) you would like to create
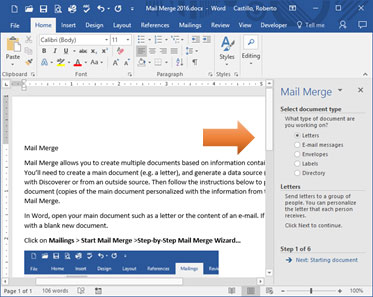
- Click on Next: Starting document at the bottom of the Mail Merge Task Bar
- At Step 2, select the following option if you are
- Creating letters or e-mails: Select Use the current document. This step will make sure the opened document will become the main document in the process
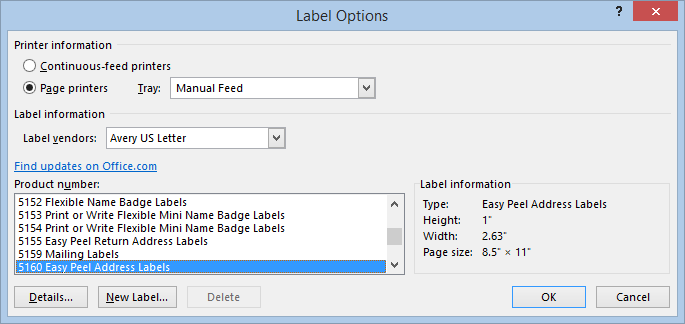
- Creating labels: Select Change document layout and click on Label options…
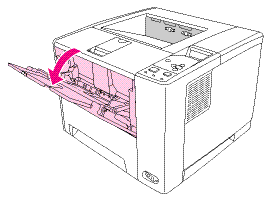
- Under Tray, select Manual Feed (Place your label paper facing up on the manual feed tray of your printer and open the rear output tray)
- Under Label vendors, make sure Avery US Letter is selected.
- Then under Product number, find the label that matches the label number on the Avery label box.
- Click on OK.
- Click on Next: Select recipients
- At step 3, select one of the two options below
- If using an Excel list, select Use an existing list, then click on Browse… Find your Excel file and click on Open
- If using Outlook Contacts, click on Select from Outlook contacts and Choose Contacts Folder. Select your contact folder from the list and click on OK
- Click on OK to complete the selection of the list
- Click on Next: Write your letter or e-mail message (if creating an e-mail)
- At step 4, click on the main document to position the cursor where the Merge Fields will be added. If the main document are labels, the cursor will be at the first label by default. Just add the Merge Fields there
- With the cursor in place, click on More items… Double click on all the Merge Fields needed to complete your document. When done,
click on the X to close
«First_Name»«Last_Name»«Street1_Line1»«City»«State»«Zip_Code» - Next, click in between each merge field, outside the chevron symbols (»|«), and add spaces and any punctuation needed to separate the Merge Fields (see below)
«First_Name» «Last_Name»
«Street1_Line1»
«City», «State» «Zip_Code» - Click on Next: Preview your letters, Labels or e-mail message to do just that. Use the arrow buttons between Recipient on the Task Bar to preview the information from the data source in your main document.

- Click on Next: Complete the merge
- Select one of the following option depending on what you are creating
- If creating letters or labels
- Click on Edit individual letters… and OK. This option will open your merged document in a new document. Check the information for accuracy.
- The last step is to either Print or Save the document for later use
- If creating e-mail messages
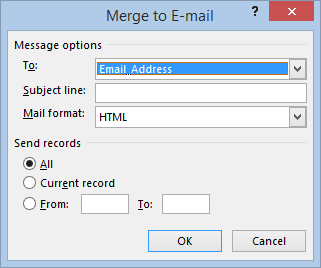
- Click on Electronic Mail…
Important: Make sure your Outlook client is opened and you are logged on with the appropriate account (e.g. your office account). Word will use this account to send the e-mail messages - At the To prompt, select the Merge Field containing the e-mail addresses.
- Enter a Subject line and click on OK. The process will take a few minutes to complete, depending on the size of the list.
