Assigning Scheduling Privileges in Zoom
As with Outlook calendars, sometimes it is necessary to schedule meetings for another Stockton community member. This functionality is built-in, but it must be enabled by individual account holders.
To designate a person as a schedule for your Zoom meetings, first log into your Zoom profile at zoom.stockton.edu. Go to “Settings”, “Other”, and then “Schedule Privilege”.
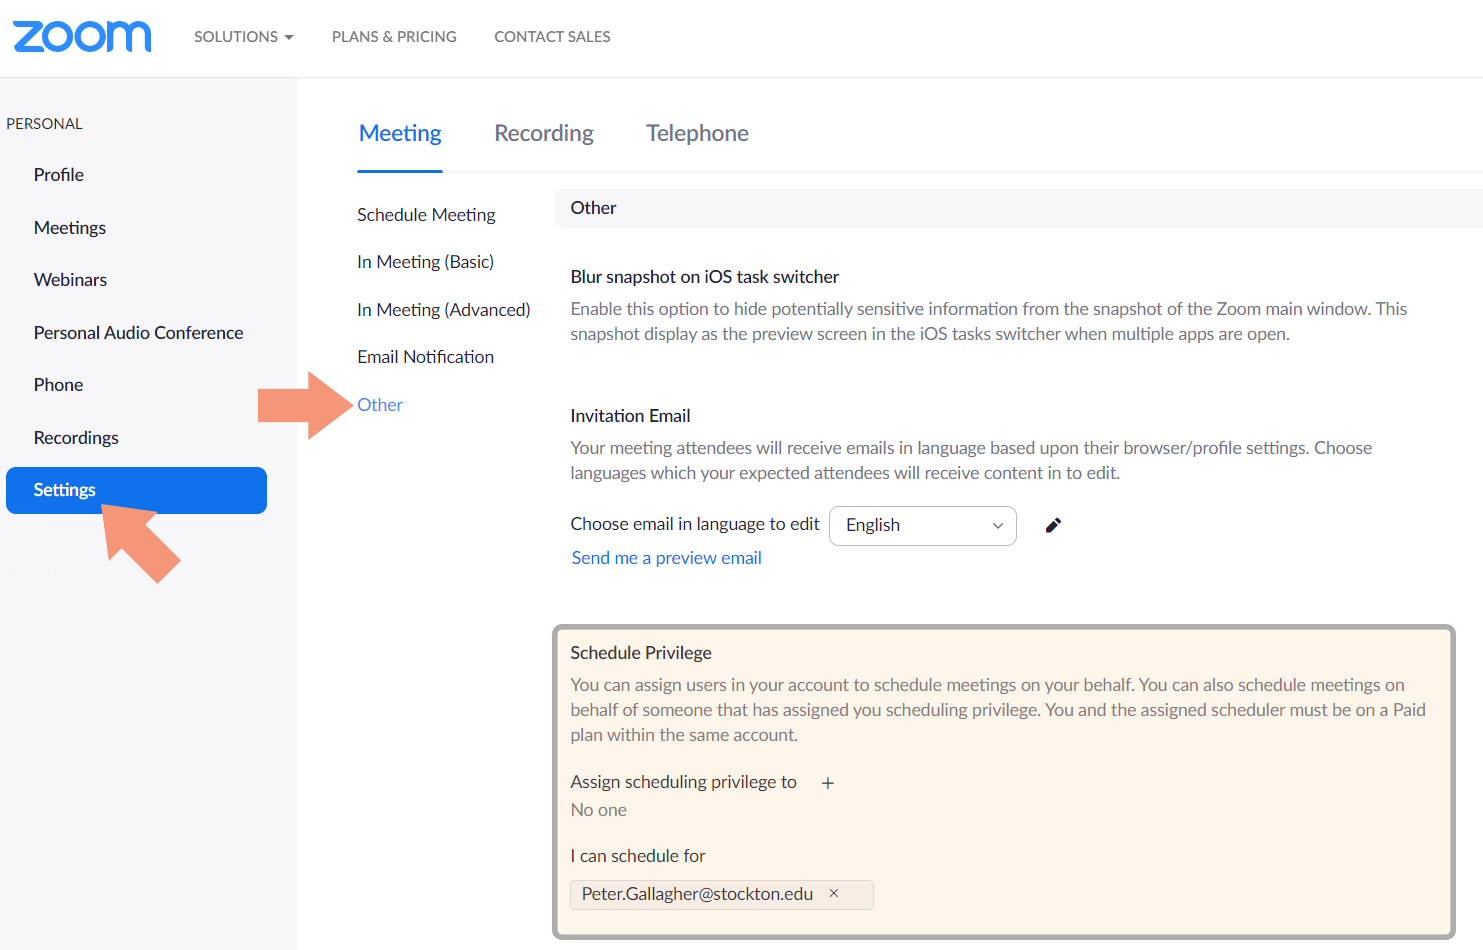
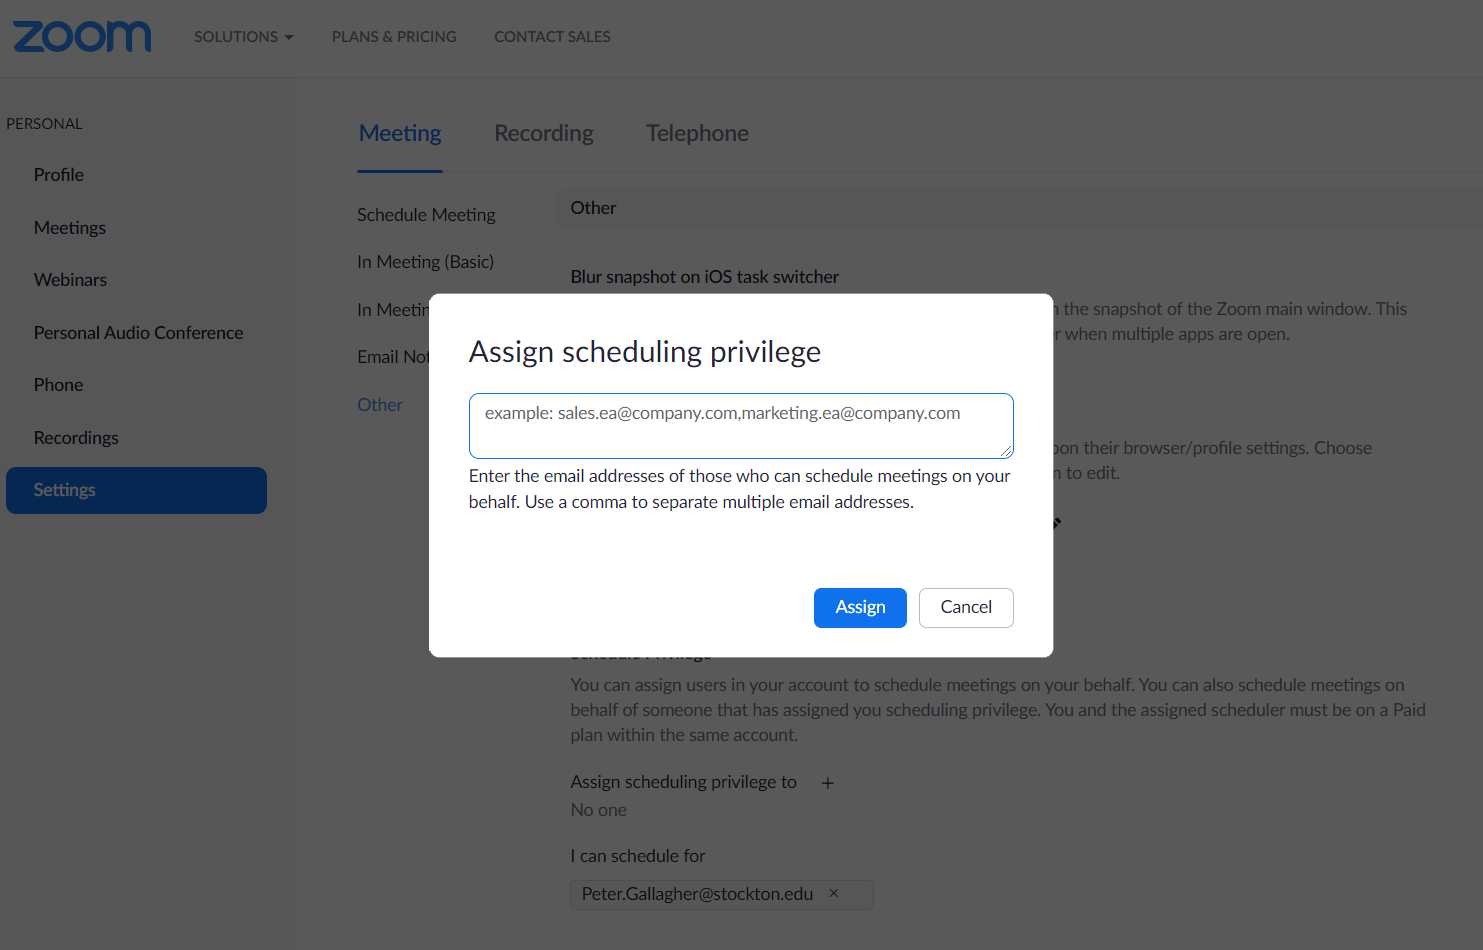
Click on “Assign scheduling privilege to” to designate someone who may create Zoom meetings for you. Under “I can schedule for” you can view a list of all users currently authorized to create meetings on your behalf.
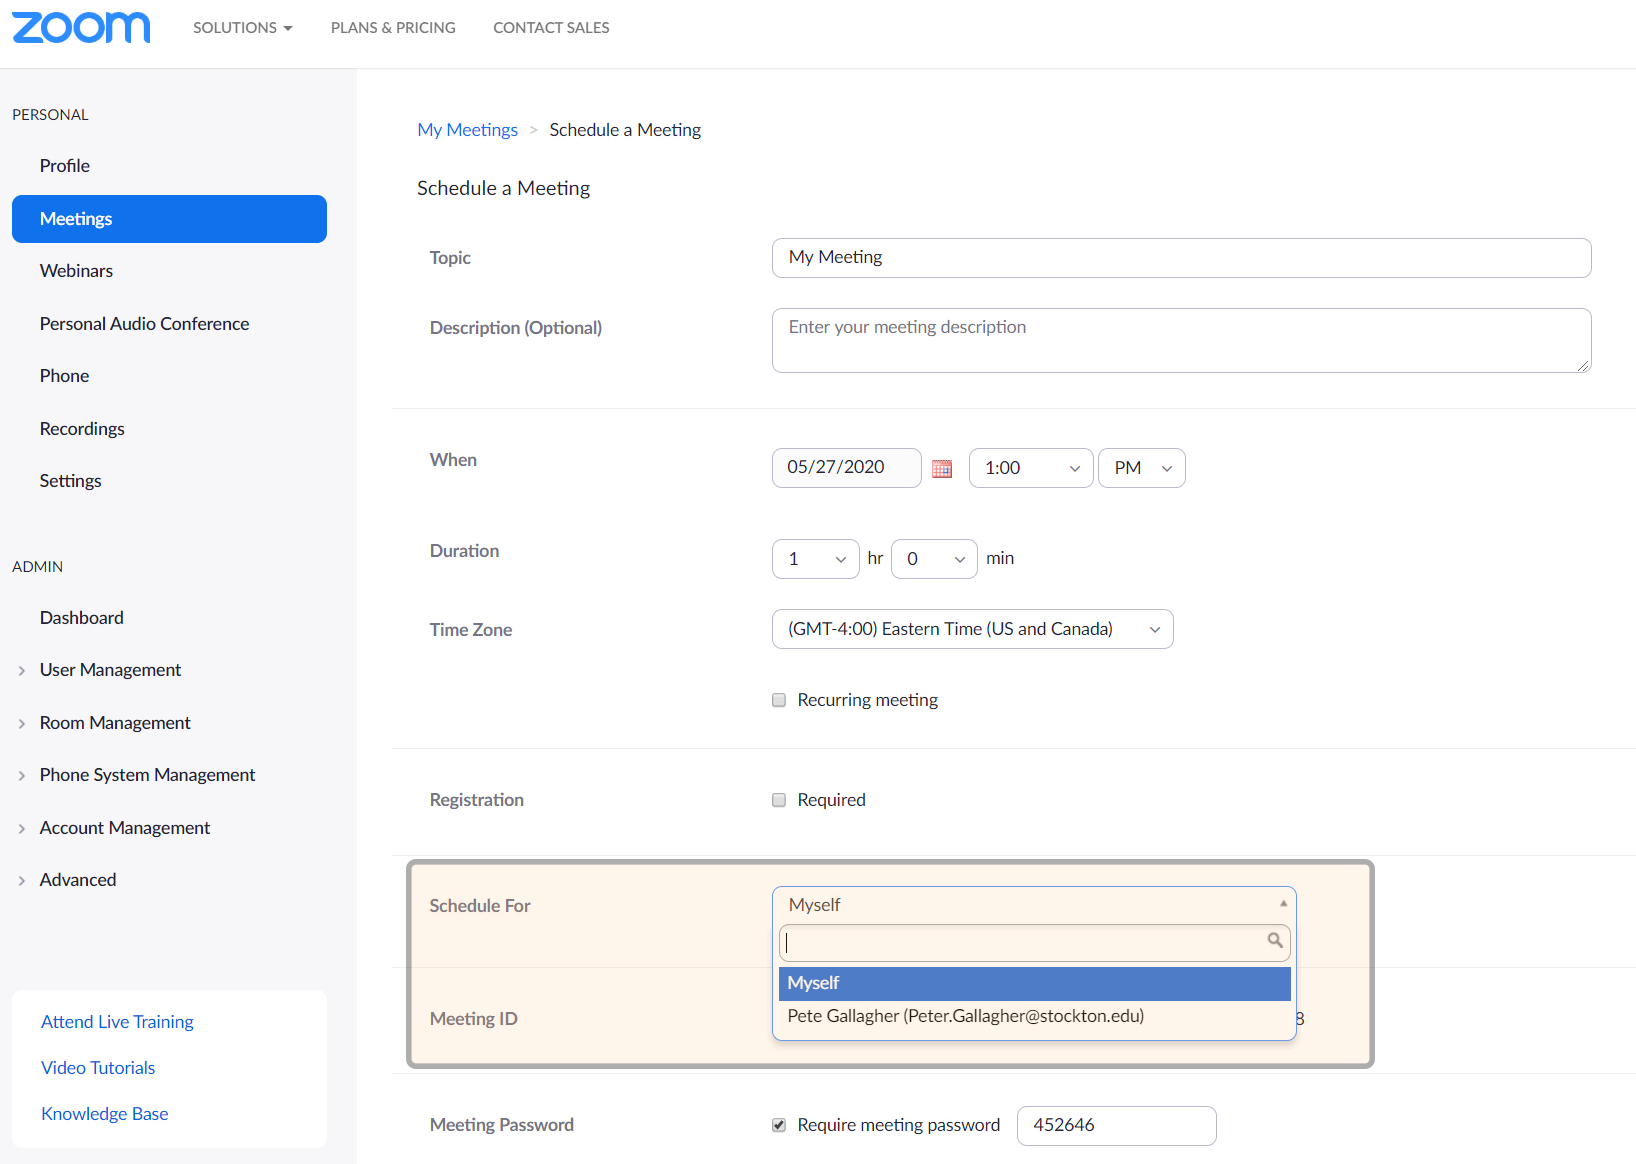
If you have been designated to create meetings for another Stockton community member, you can do so as if you were scheduling a normal meeting. Under the “Schedule For” setting, you may choose from a list of users you are authorized to schedule for.
Once you’ve chosen a user, proceed to create a meeting as you normally would.
Meetings created in this way can be edited later by both the named user and the assigned scheduler.