Microsoft 365 Support
🧭 Overview
- You will learn how to access Microsoft 365 services and complete common tasks.
- Best for: Students, faculty, staff, and student workers.
- Time: ~10 minutes.
Prerequisites
- Active Stockton account and SSO access.
- Your GoPortal password.
- Access to Duo authentication when prompted.
- A device with a supported web browser and internet connection.
Microsoft 365 Sign-In and Apps
Use the accordion below to sign in and find web-based Microsoft 365 applications.
Sign in to Microsoft 365
Use your Stockton account to sign in to the Microsoft 365 portal.
-
Open the portal
Open a web browser and go to the Microsoft 365 portal.
-
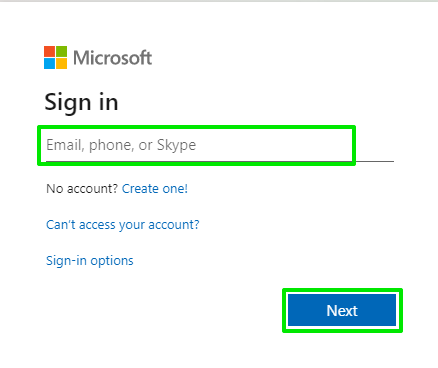
Enter your email address
Enter your Stockton email address and select Next.
- Students: username@go.stockton.edu
- Faculty, staff, and student workers: first.last@stockton.edu
-
Authenticate
Enter your GoPortal password and complete Duo authentication if prompted. You will then be taken to the Microsoft 365 portal.
Open Microsoft 365 web apps
After signing in, use the Apps menu to open available Microsoft 365 applications in your browser.
-
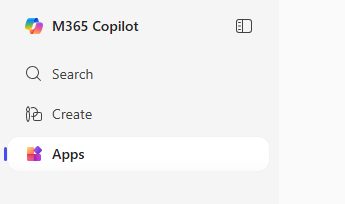
Select Apps
Select Apps from the Microsoft 365 portal to view popular applications.
-
Open an app
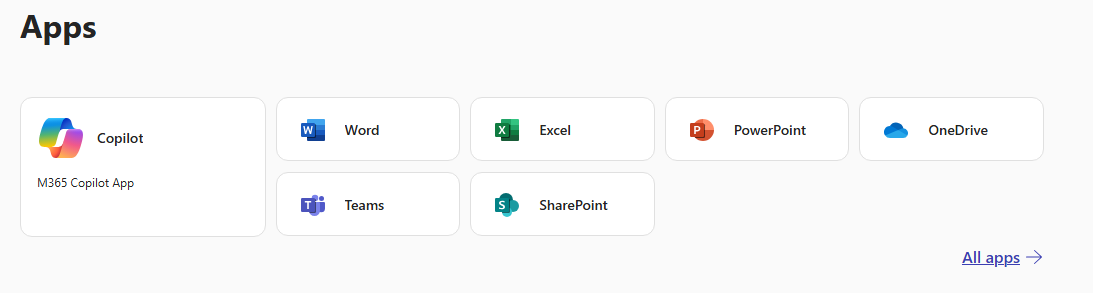
Select an application icon, such as Word, Excel, PowerPoint, OneNote, or Teams, to open it in your web browser.
-
View all apps
Select All apps to view the full catalog of Microsoft 365 applications available to your account.
OneDrive
OneDrive is Microsoft 365 cloud storage for saving, accessing, sharing, and collaborating on files.
Access OneDrive cloud storage
OneDrive supports Microsoft Office files, file version history, file sharing, and access from web browsers, desktop applications, and mobile devices.
-
Open OneDrive
Go to onedrive.microsoft.com.
-
Sign in
Sign in with your Stockton account if prompted.
-
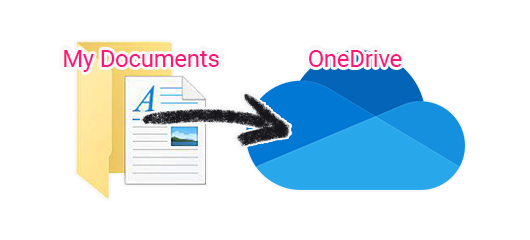
Manage files
Select files and folders to open, upload, organize, share, or download them.
-
Install the OneDrive app
Desktop and mobile versions of OneDrive are available from the OneDrive download page.
Share files and folders in OneDrive
Share files and folders with people at Stockton or external recipients when permitted.
-
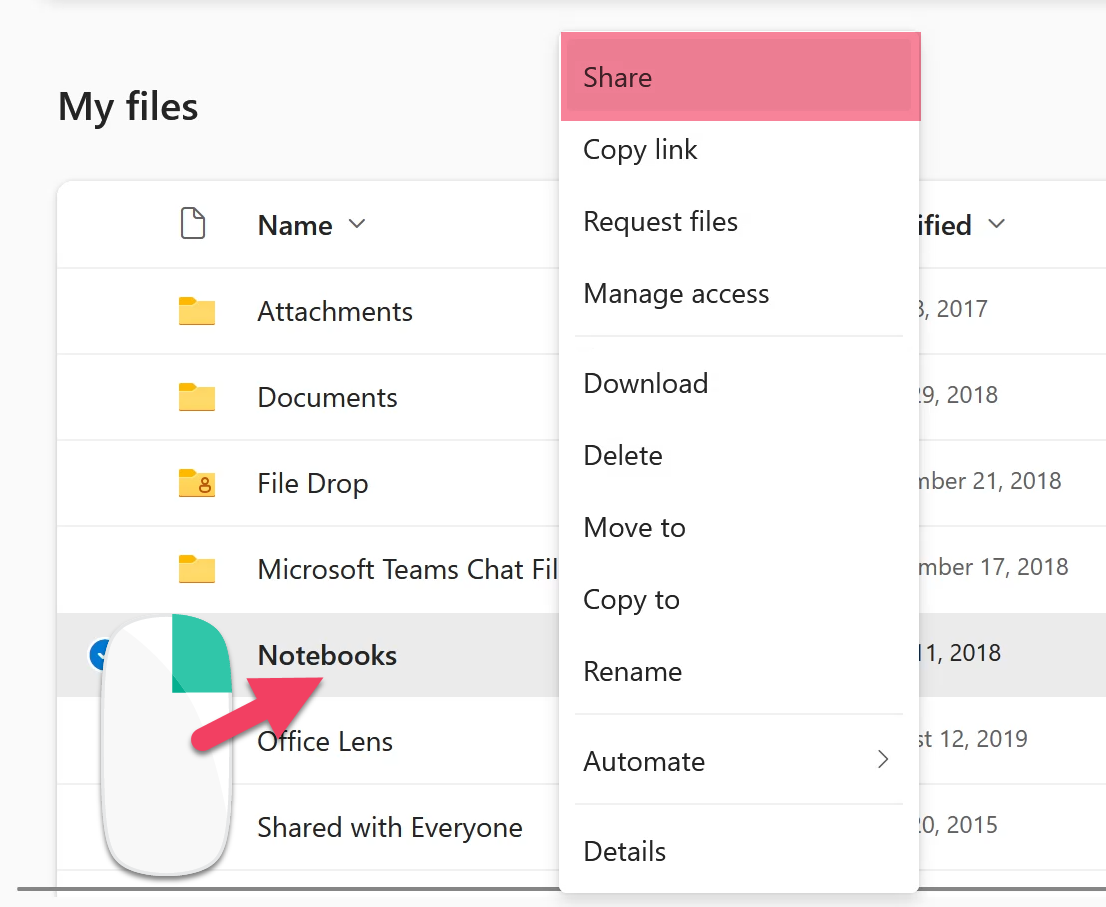
Select the item
In OneDrive or File Explorer, right-click the file or folder you want to share.
-
Choose Share
Select Share from the menu.
-
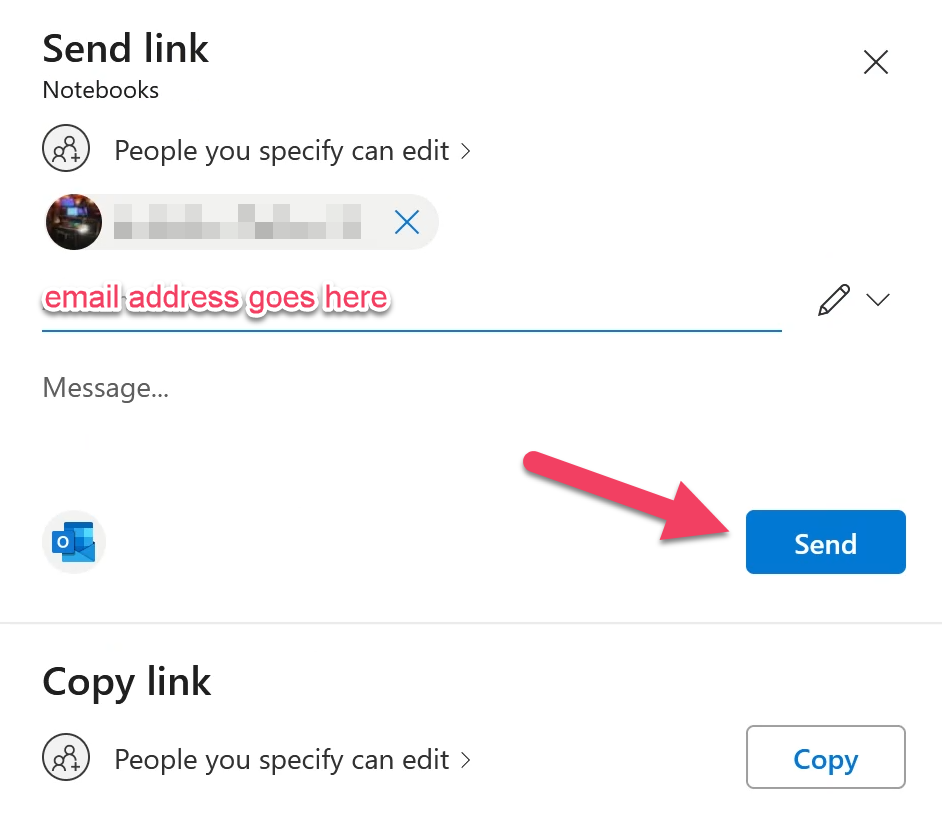
Add recipients
Enter the email addresses of the people who need access. Review the sharing permissions before continuing.
-
Send the invitation
Add an optional message, then select Send. Recipients receive an email with access to the shared item.
Restore deleted OneDrive files
Use the OneDrive Recycle Bin to recover files or folders that were deleted accidentally.
-
Open OneDrive
Go to OneDrive and sign in with your Stockton account.
-
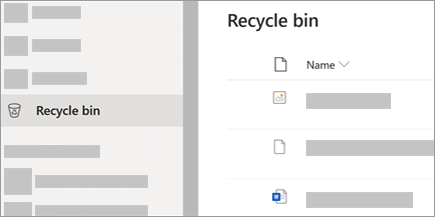
Open Recycle Bin
Select Recycle bin from the left navigation menu.
-
Restore the item
Select the files or folders you want to recover, then select Restore.
SharePoint
SharePoint provides team sites, shared document libraries, controlled access, and document collaboration tools.
Access SharePoint
SharePoint access and site membership are managed based on the needs of the site and the permissions assigned to you.
-
Open SharePoint
Go to Stockton SharePoint.
-
Sign in
Sign in with your Stockton account if prompted.
-
Open a site
Select a site from your frequent sites, followed sites, or search results.
Manage SharePoint members
SharePoint site owners can add members, remove members, and change member permissions.
-
Open the site
Open the SharePoint site where you are an owner.
-
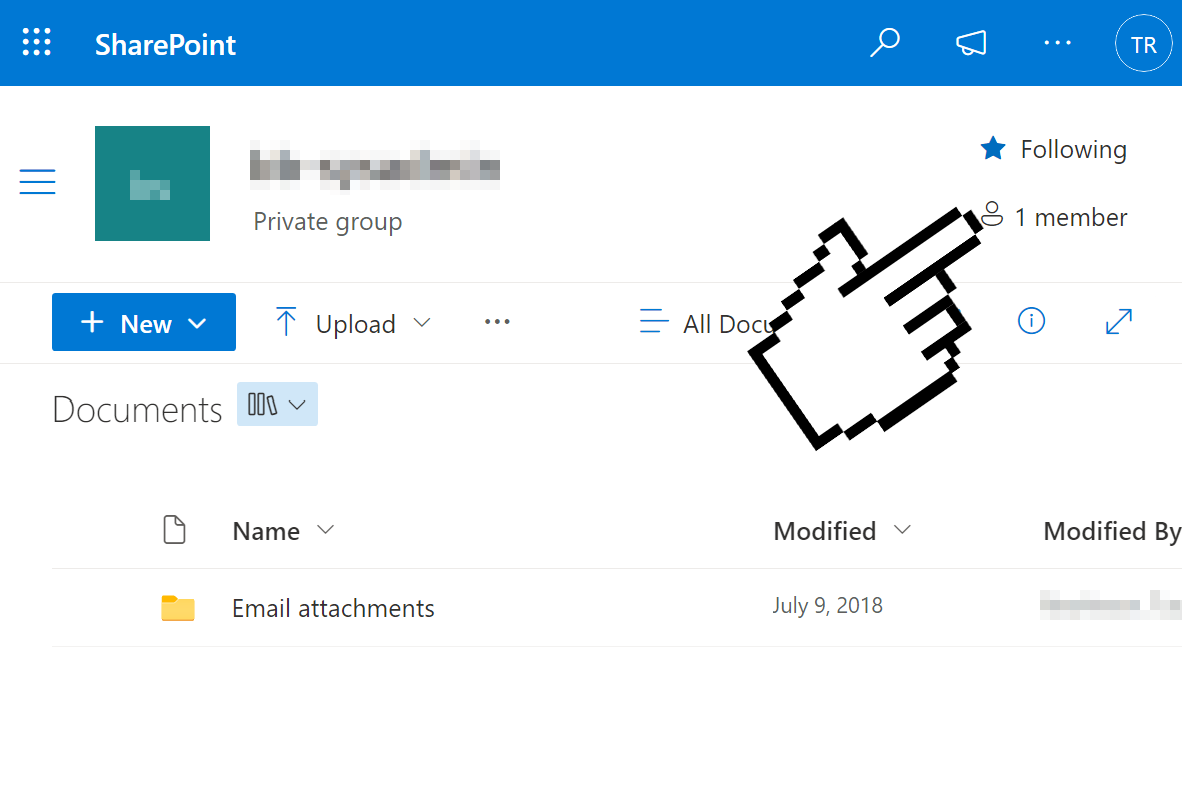
Open the Members menu
Select the Members button near the upper-right corner of the page.
-
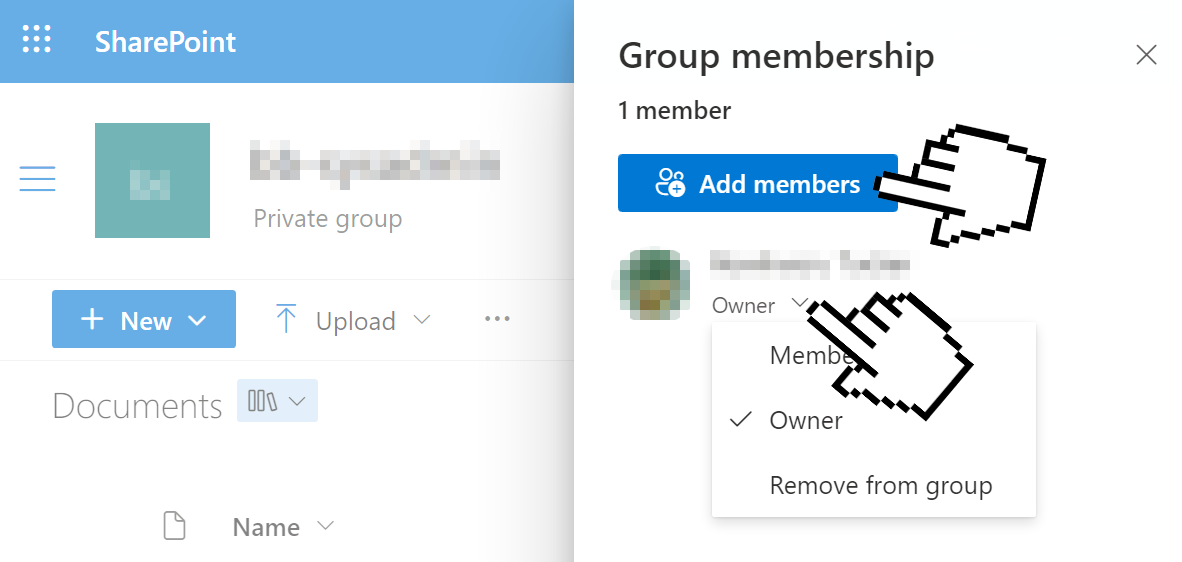
Update access
Select Add members to add a person. Use the menu next to an existing member to change their role or remove their access.
Sync SharePoint folders to your computer
Syncing a SharePoint document library lets you access its files in File Explorer while OneDrive keeps them synchronized.
-
Open the document library
Open the SharePoint site that contains the files you need, then select Documents or the document library you want to sync.
-
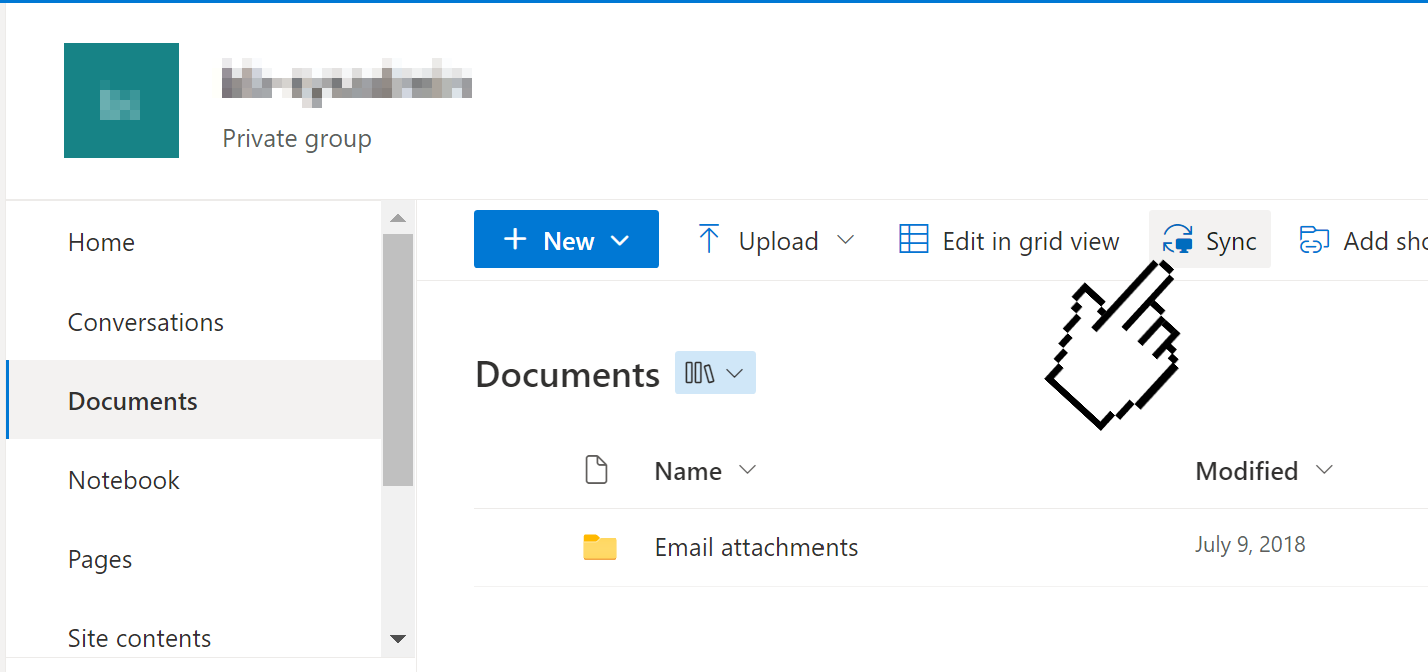
Select Sync
Select Sync from the document library toolbar.
-
Approve OneDrive prompts
Approve any browser or OneDrive prompts to start the sync process.
-
Find the synced files
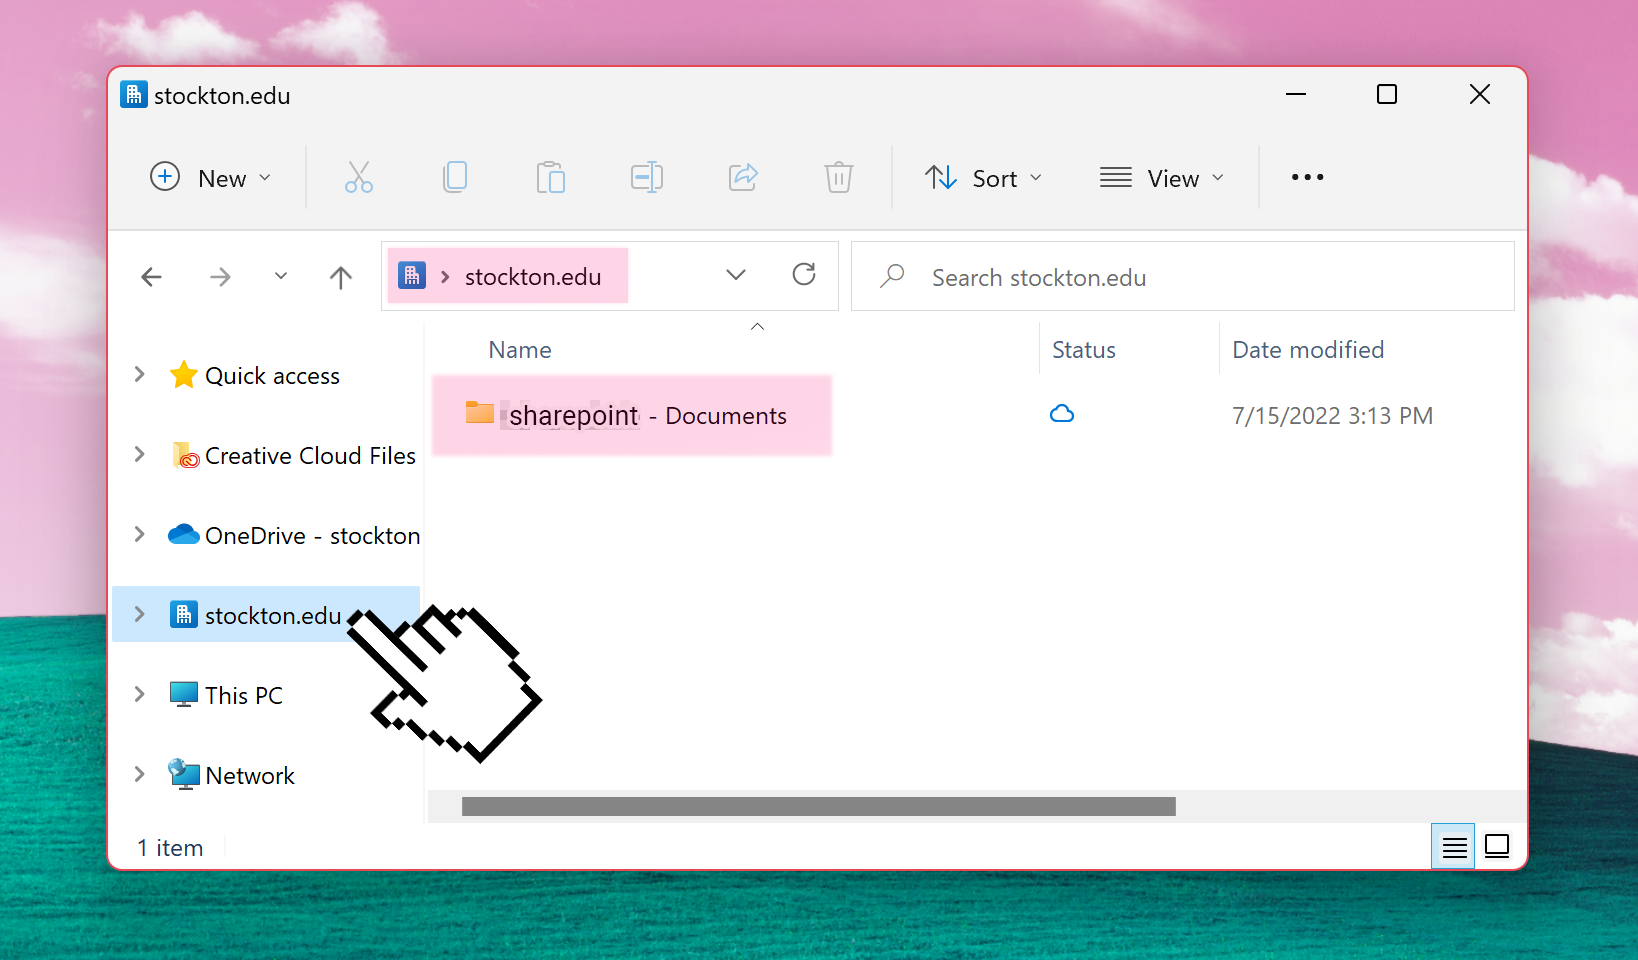
Open File Explorer. The synced library appears under the Stockton University organization name in the left navigation pane.
Shared Email Access
Microsoft 365 supports Microsoft 365 Groups, shared mailboxes, and distribution groups. Each accordion contains a process list for the related task.
View Microsoft 365 Groups
Microsoft 365 Groups provide shared conversations, files, calendars, and membership management for teams.
-
Open Outlook
Go to Outlook on the web or open Outlook for Windows.
-
Find Groups
In the left navigation pane, expand Groups.
-
Open a group
Select a group to view its conversations, files, calendar, and members.
Update Microsoft 365 Group subscription settings
Group subscription settings determine whether group conversations are delivered to your personal inbox.
-
Open the group
Open the Microsoft 365 Group in Outlook on the web.
-
Open group settings
Select the group settings or membership options available for the group.
-
Update your subscription
Choose whether you want group conversations delivered to your inbox, then save your changes.
Manage Microsoft 365 Group membership
Only Microsoft 365 Group owners can add members, remove members, or update member roles.
-
Open the group
Open the Microsoft 365 Group in Outlook on the web.
-
Open membership settings
Select the member list or group settings.
-
Update membership
Select Add members to add a person. Select an existing member to remove them or update their role, then save your changes.
Join a distribution group
Some distribution groups allow self-service membership. If a group is not available, contact the group owner or the ITS Help Desk.
-
Open Outlook settings
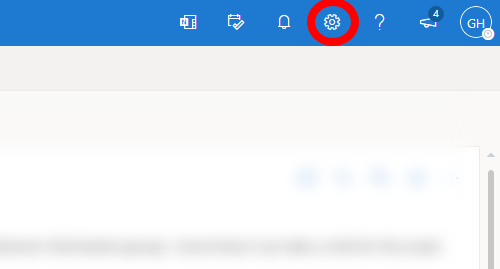
Go to Outlook on the web, sign in, and select the gear icon in the upper-right corner.
-
Open Distribution groups
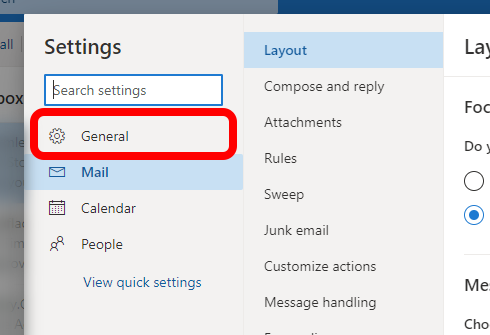
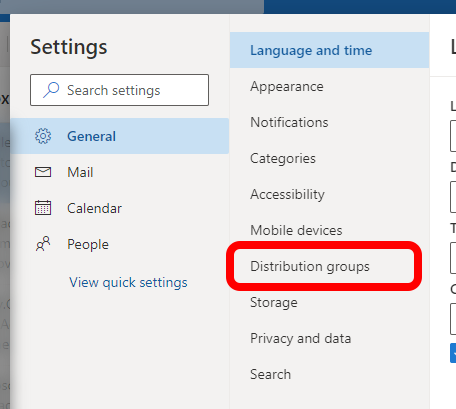
Select General, then select Distribution groups.
-
Open the group portal
Select the Visit this portal link.
-
Join the group
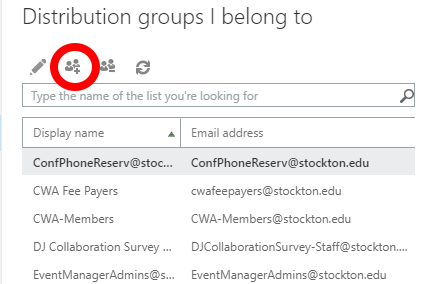
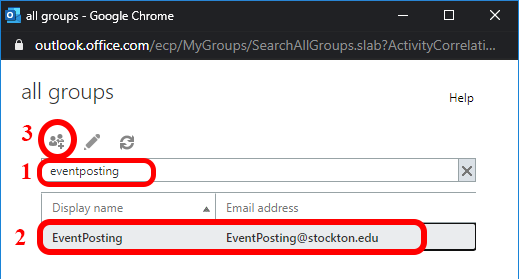
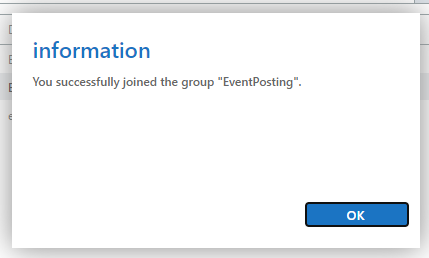
Under Distribution groups I belong to, select Join. Search for the group, select it, and choose Join again.
Leave a distribution group
Use the distribution group portal to remove yourself from a group that allows self-service membership changes.
-
Open the group portal
In Outlook on the web, go to Settings, select General, select Distribution groups, and then select Visit this portal.
-
Select the group
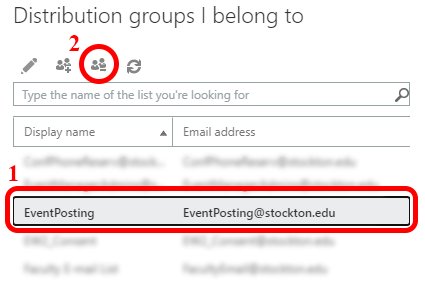
Under Distribution groups I belong to, select the group you want to leave.
-
Leave the group
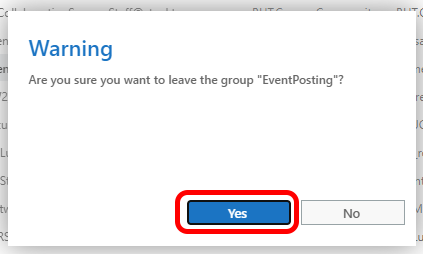
Select Leave, then confirm the removal.
-
Verify removal
Confirm that the group no longer appears in your distribution group list. Contact the group owner or ITS if you cannot remove yourself.
Related
Get help
- Phone: 609-652-4309
- ️ Email: helpdesk@stockton.edu
- 🧾 Submit a ticket