Edit or Re-Authenticate a Proxy
Students can use these steps to re-authenticate an existing proxy or update the level of access a proxy has to their student records.
-
Log into the Proxy Management System:
Log into the Proxy Management system using your goPortal credentials.
-
Access Proxy Management & Edit an existing Proxy User:
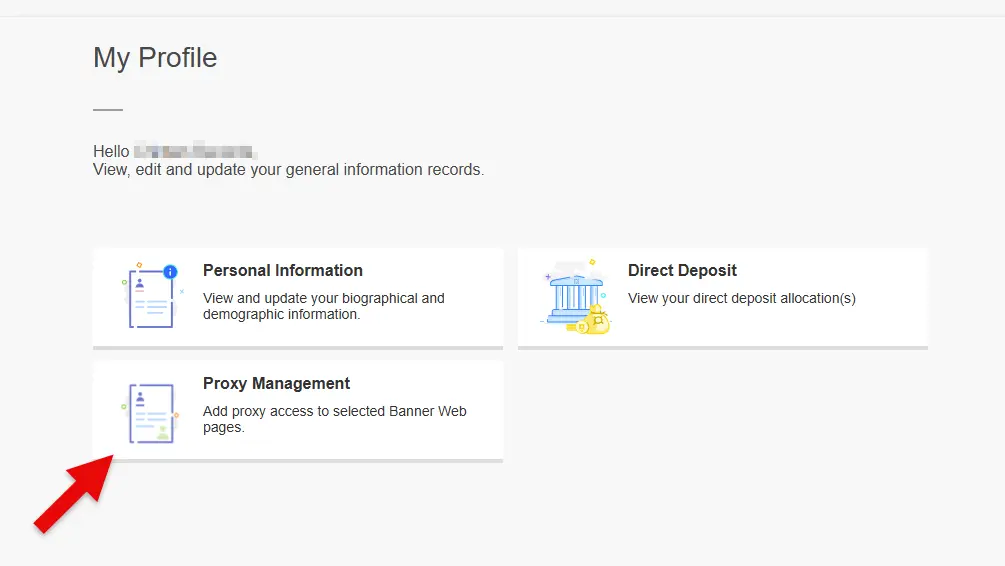
From, the welcome screen, Click Proxy Management 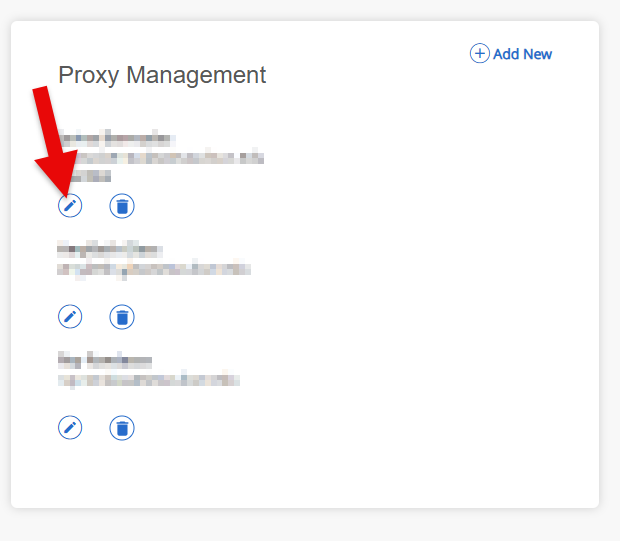
Your current proxy users will be listed here. Click the Edit icon to edit an existing Proxy. -
Verify Proxy details and create a Passphrase if one doesn't exist:
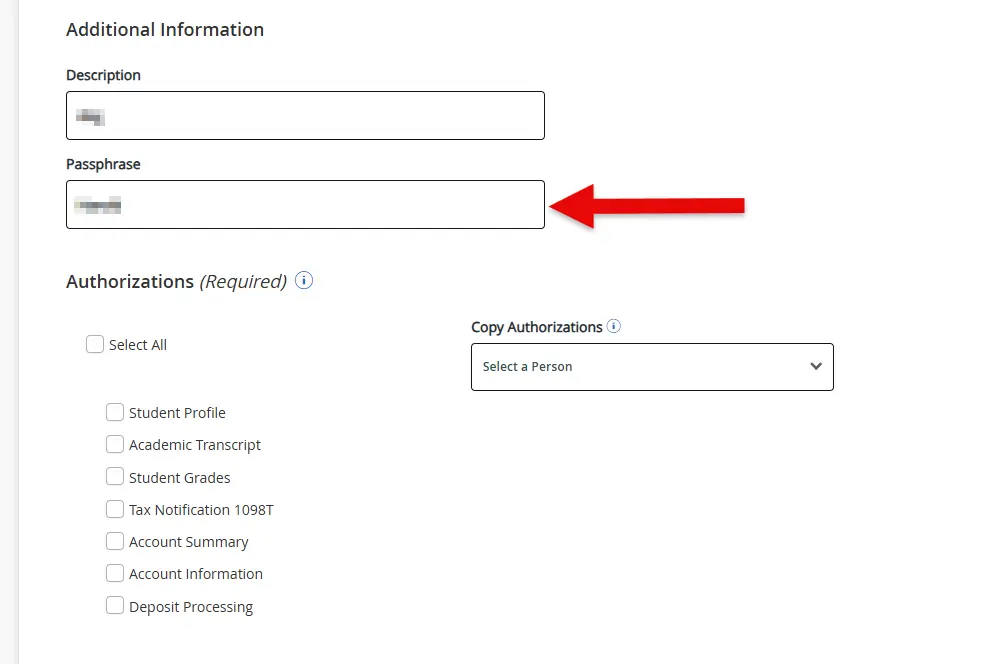
Create a passphrase if one doesn't exist. The description is a hint for the passphrase (similar to password hints). -
Select or update the level of access to your records:
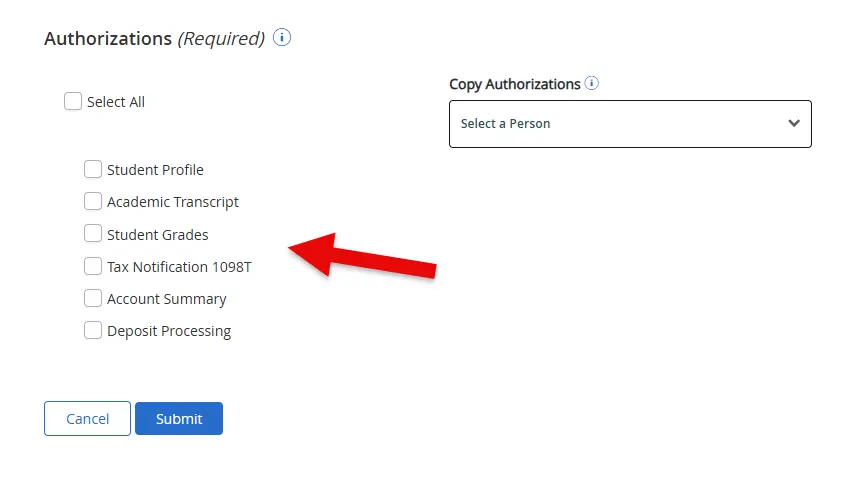
Select the specific items a proxy is authorized to view, such as grades, transcripts, or tax notifications, before submitting the form. -
Submit the changes:
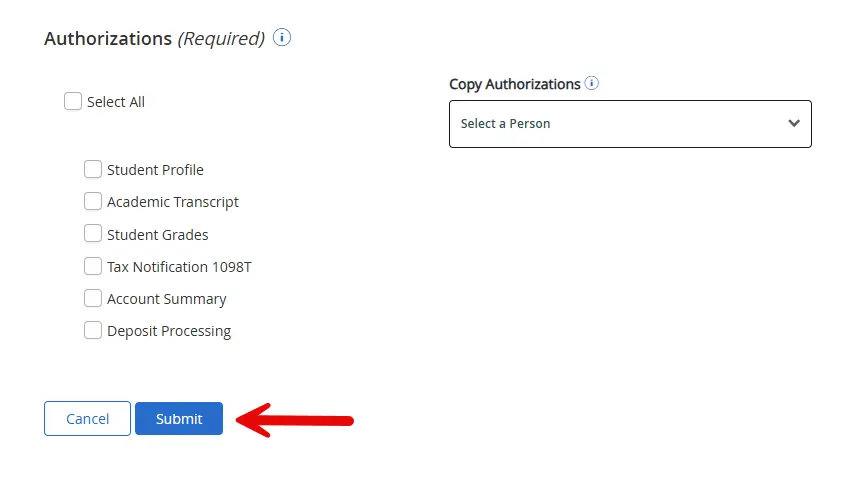
Click Submit to save your changes. -
Edit the user once more to send notification emails:
Click the Edit icon to edit the same Proxy user. 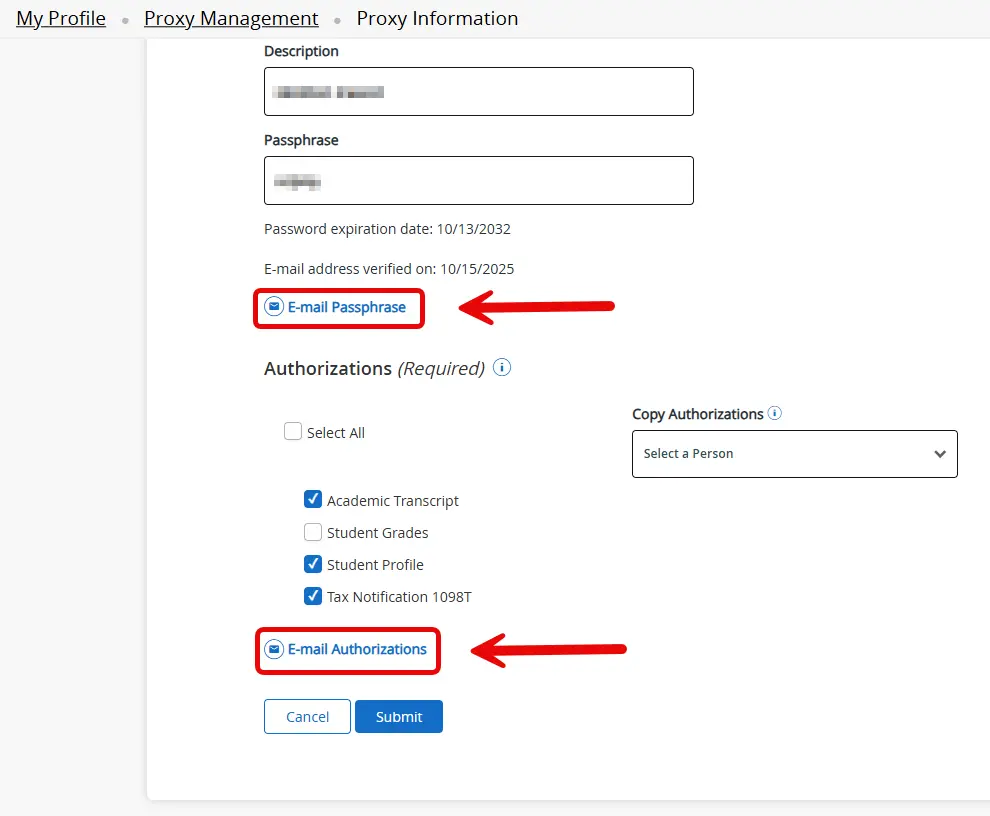
Click "Email Passphrase" and "Email Authorization" to email the confirmation and account instructions to your Proxy. -
Notify your proxy user that an email is coming:
Your proxy will be sent an email, but please contact them directly so they know to watch for it. If they don’t see it in their inbox, they should also check their junk or spam folder.
For more information about student privacy and authorization, visit Stockton University’s FERPA information page.